


Draining cooking oil from a countertop appliance requires patience, precise mechanical adjustments, and strict kitchen safety habits. Hot oil retains high thermal energy far longer than water, creating severe splash and burn hazards if handled prematurely. Mastering how to drain t fal deep fryer equipment ensures that cooking oil filters cleanly into the dedicated storage box without leaking across kitchen counters or causing painful burns.
Most modern T-Fal deep fryers feature an automated oil filtration mechanism that separates clear cooking fat from charred batter sediment. Keeping the internal drain valve clear and using an effective appliance degreaser on the removable housing keeps the machine operating smoothly for future cooking sessions. Following proper handling procedures also extends the usable lifespan of your cooking oil while maintaining a clean, odor-free kitchen workspace.


Complete Guide to Draining and Filtering a T-Fal Deep Fryer
Draining and maintaining a deep fryer is an essential post-cooking routine that preserves oil quality and keeps heating components operating reliably. T-Fal deep fryers equipped with the EZ Clean oil filtration system use an automated gravity-fed valve to channel liquid oil through a fine mesh screen into a lower storage container. Understanding the physical mechanics of this filtration cycle ensures safe operation, prevents kitchen spills, and keeps cooking oil fresh across multiple uses.
Essential Safety Rules and Cool-Down Times Before Draining
Working with hot oil presents significant thermal burn risks that require strict adherence to cooling protocols. Frying oil frequently reaches operating temperatures between 350°F and 375°F during normal cooking cycles. You must allow the entire volume of oil to cool down completely to room temperature before attempting any drainage procedure. In typical household kitchens, cooling several liters of cooking fat takes at least two to three hours.
Never move, tilt, or adjust the filtration dial on your deep fryer while the oil remains hot. Attempting to drain hot oil can soften plastic drainage components, damage the internal silicone seals, and cause catastrophic splash injuries. Verifying that the outer metallic housing and the oil surface feel completely cool to the touch ensures the appliance is safe to handle.
Unplugging the appliance from the electrical outlet is the first physical step in preparing the unit for maintenance. Many T-Fal fryers utilize a detachable magnetic power cord, such as the T-Fal SS-992896 FF103850/89 Deep Fryer Power Cord, designed to release easily if snagged. Disconnecting this cord from the back of the fryer removes all electrical current and eliminates the risk of accidental element activation while draining.
The T-Fal Automated Filtration Dial Mechanism
The control interface on an EZ Clean T-Fal deep fryer includes a multi-position selector knob located near the base of the unit. This dial regulates the internal spring-loaded drain valve positioned at the lowest point of the removable oil bowl. The three primary settings on this selector include the standard frying position, the automatic filtration position, and the oil box release position.
In the standard frying setting, the drain valve remains sealed tightly against a heat-resistant gasket to hold the oil securely inside the cooking basin. When rotated to the automatic filtration setting, the internal mechanism relieves tension on the valve stem, allowing gravity to draw the cooled liquid down through the integrated filter screen. The fine metallic screen captures burnt crumbs, loose flour, and food debris before the clarified oil enters the lower storage box.
Rotating the dial to the box release setting allows the lower plastic container to disengage from the locking track. You should never turn the knob to the release position while oil is actively draining through the valve opening. Operating the dial in the correct sequential order protects the internal valve assembly and guarantees leak-free drainage.
Step-by-Step Oil Drainage Procedure
Before initiating the drainage cycle, verify that the lower plastic oil storage container is fully seated inside its housing bay. The blue plastic oil box must be pushed entirely into the base until it locks securely against the bottom receiving port. If the container sits crooked or loose, oil will spill beneath the appliance rather than collecting inside the reservoir.
Rotate the front selector knob clockwise from the frying icon to the automatic filtration icon once the oil has reached ambient room temperature. You will feel a slight mechanical resistance as the internal cam unseats the drainage valve plug. Liquid oil will immediately begin flowing from the stainless steel reservoir down into the lower filtration chamber.
Allow gravity to draw the entire oil volume through the mesh screen without tilting or shaking the appliance. Depending on the oil volume and viscosity, complete drainage generally takes anywhere from five to fifteen minutes. Once the upper metal basin is completely empty of standing liquid, the drainage phase is officially complete.
Clearing Clogged Drain Valves and Sediment Obstructions
Heavy frying sessions involving wet batters, cornstarch coatings, or loose breadcrumbs frequently generate dense sediment layers at the bottom of the oil bowl. Over time, these compacted food particles can settle directly over the fine mesh intake port, preventing oil from draining into the lower container. When this happens, oil remains pooled in the basin even when the dial sits on the filtration setting.
Clearing a blocked drain valve requires a careful approach to avoid damaging internal silicone gaskets or metal mesh screens. A specialized tool such as the FryOilSaver 25″ Deep Fryer Cleanout Rod provides the length and angled leverage needed to reach deep drain channels and dislodge compacted food debris safely. The extended length keeps your hands clear of greasy surfaces while the rounded, rust-resistant metal tip pushes blockages through the opening without puncturing delicate components.
Never use sharp kitchen knives, wooden skewers, or rigid screwdrivers to clear a stuck T-Fal drainage valve. Puncturing the filtration screen or scratching the valve seat creates permanent oil leaks that compromise the entire machine. If heavy sludge creates persistent resistance, gently stirring the bottom sediment with a silicone spatula can help restore steady gravity flow through the drain opening.
Handling and Storing the Lower Oil Storage Container
Once all oil has filtered into the lower container, rotate the front control knob to the unlock position. Grasp the handle of the blue plastic oil reservoir and slide it smoothly out from the bottom track of the appliance. Keep the container level as you slide it free to prevent any accidental splashes from the upper inlet opening.
Inspect the screw cap on the oil box to ensure the rubber sealing ring sits flat inside the threads before tightening it down firmly. The integrated cap seals the oil container hermetically, preventing air exposure and kitchen odor absorption. This sealed configuration allows you to store the filtered oil directly inside the box without transferring the liquid to external glass jars.
Store the sealed oil container in a cool, dark cabinet or inside the refrigerator to slow down oxidation. Cooking oil degrades rapidly when exposed to direct sunlight, high room temperatures, or ambient kitchen moisture. Chilled oil may turn cloudy or develop a thicker semi-solid consistency in the refrigerator, but it will return to a clear liquid state once warmed during the next frying cycle.
Manual Draining Methods for Non-Filtration T-Fal Models
Certain compact or budget-friendly T-Fal deep fryer models do not include the automated EZ Clean bottom drawer system. These standard appliances feature a fixed or manually removable interior oil basin that requires manual decanting. Draining these models calls for steady hands and dedicated external storage containers to avoid grease spills.
Wait until the oil reaches room temperature, then lift the frying basket and electrical heating control unit out of the appliance housing. If your model features a fully removable metal pot, lift the bowl upward using both hands and position the integrated pouring spout over a funnel. Place a fine metal mesh strainer or double-layered cheesecloth inside the funnel to capture burnt crumbs as you pour the liquid fat into a clean vessel.
For units with a permanently fixed non-removable inner basin, you must ladle out the bulk of the cooled oil into a storage bowl before tipping the entire housing. Pour slowly and maintain a continuous, steady stream to prevent oil from running down the exterior plastic walls of the machine. Wipe down the outer lip immediately after pouring to eliminate greasy residue.
Washing and Degreasing Fryer Components After Drainage
Cleaning the appliance thoroughly after draining the oil prevents rancid odors from developing and keeps heating surfaces free of sticky polymerized grease. The electrical control head containing the heating element must receive special care during cleanup. You must never submerge the electrical control box, power cord, or heating element assembly in water or place them inside a dishwasher.
Wipe down the stainless steel heating coils using a damp cloth and mild dish soap to remove grease films, then dry the metal completely with a paper towel. The removable oil bowl, frying basket, lid, and outer plastic housing can typically be washed in warm soapy water using non-scratch sponge pads. Inspect the drain valve area in the bottom of the bowl to ensure no trapped food fragments linger around the spring mechanism.
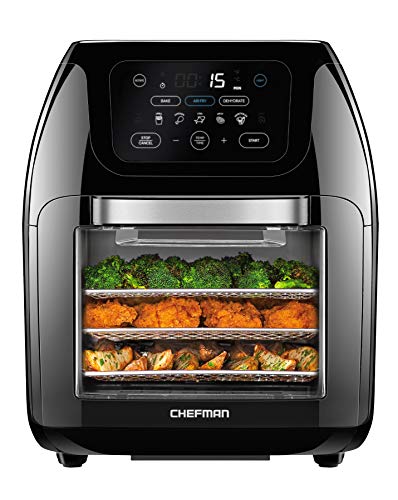
While many home cooks enjoy experimenting with dual-zone countertop convection fryers for everyday lower-oil meals, traditional deep fryers still require diligent degreasing to stay functional. Spraying the removable components with warm soapy water dissolves lingering oil films before they harden onto plastic surfaces. Always allow every washed part to dry completely in the open air before reassembling the unit.
Identifying Degraded Oil and Disposal Practices
Filtered cooking oil can be reused multiple times, but repeated exposure to high temperatures gradually breaks down its chemical structure. Inspect the clarity, viscosity, and aroma of your filtered oil before deciding whether to use it for another cooking cycle. Degraded oil exhibits a dark amber or brown tint, runs with a noticeably thick consistency, and emits a sour, acrid odor.
Another clear sign of oil breakdown is excessive foaming when food is submerged, or premature smoking below normal frying temperatures. While mastering crispy poultry cooking methods in convection appliances bypasses oil disposal challenges altogether, traditional frying demands strict oil replacement standards. Discard cooking oil immediately if you observe persistent white smoke rising from the bowl during warm-up periods.
Never pour used cooking oil down household sinks, garbage disposals, or outdoor storm drains. Cooled cooking fats solidify inside domestic plumbing pipes, generating severe clogs and contributing to municipal sewer blockages. Instead, pour expired cooking oil into an empty plastic bottle or sealable metal can, tighten the lid, and dispose of it directly in your regular household trash.
Reassembly and Resetting for Future Frying
Reassembling your T-Fal deep fryer requires total moisture removal across every component. Even minute droplets of residual water trapped inside the metal bowl or drain opening will boil explosively when fresh oil heats to frying temperatures, causing violent bubbling and dangerous hot oil eruptions. Use clean, dry microfiber cloths to wipe down the inside of the bowl, paying close attention to the recessed drain channel.
Once every part is completely dry, seat the metal oil bowl firmly back into the main housing. Reinsert the electrical heating element assembly into the vertical tracking slots until the safety microswitch engages properly. The appliance will not draw power or activate the heating element if the control head does not sit completely flush inside the mounting bracket.
Rotate the front selector knob counter-clockwise back to the frying setting before adding any new or filtered oil into the cooking bowl. Returning the dial to the frying position seals the bottom valve, ensuring that freshly poured oil remains safely inside the upper reservoir. Slide the clean, empty oil storage container back into the lower bay so the machine stands fully assembled and prepared for its next cooking cycle.
Developing a consistent routine around oil drainage protects your kitchen from messy grease spills and keeps your deep fryer operating safely. Allowing ample time for the oil to cool, utilizing proper cleanout tools when sediment causes blockages, and storing clarified fat in a sealed container will preserve your equipment for years of dependable countertop frying.



Write Your Review
No reviews yet. Be the first to share your experience!